Likes Likes:  0
Thanks Thanks:  0
HaHa HaHa:  0
Page 1 of 2 12 LastLast
Results 1 to 10 of 18

Thread: Bait, How do you raise your own?

  1. #1
    Join Date
    Feb 2007
    Location
    Lovell, Wyoming
    Posts
    941
    Post Thanks / Like

    Default Bait, How do you raise your own?


    Any info on raising mealworms, waxworms, crickets, minnows, would be appreciated
    Brian

    Will fish for food!

  2. #2
    Join Date
    Feb 2009
    Location
    savannah,ga
    Posts
    198
    Post Thanks / Like

    Default

    this is what i am going to use for my rasing of crickets. is my sisters old fish tank. and the only thing i need to get for them is a food tray and some type of watering device. and build a cover screen for the tank, as for were i am getting my crickets from it will be this place Armstrong Crickets - decent prices on thier crickets and worms. and the have all the stuff for both.

  3. #3
    Join Date
    Sep 2005
    Location
    Martin, Tn.
    Posts
    483
    Post Thanks / Like

    Default

    Raising Your Own Mealworms
    1. Find a clear plastic container with approximately six-inch high sides. It may be the size of one to three square feet. For ventilation, drill about forty 1/4 inch holes in the lid. If condensation occurs, drill even more holes, or cover the container with a screen.
    2. Put about three inches of one part chick starter (or laying mash) and one part wheat bran (optional) in the container. Mix well and level it. This is food for your newly hatched mealworms.
    3. Cut an apple in half. Turn the round side down and push it down into the feed until flush with the feed and bran mixture. This is to give them moisture. If the skin of the apple is removed, the moisture in it will get into your feed and will spoil it. For this reason, do not peel your apples. Check your cultures every week to make sure they aren't out of apples.
    4. Add thirty to forty mealworms per square foot of container. Get them from your friends, or you can find them in a farmer's feed building, usually under his feed bags. They can also be bought. Add four layers of unprinted paper such as the regular brown grocery bags. Put paper on top of the feed mixture, apple halves, and mealworms. Mealworms love to hide between the layers of paper. I record the date I start each culture on the top layer of paper.
    5. Store such a started culture at room temperature, or warmer. These mealworms will each turn into a pupa, then the pupa will turn into a beetle. These beetles will mate, then lay their eggs between the paper and feed. After this, the beetles die. This is their complete life cycle. Soon, you'll see many tiny mealworms when you run your fingers through the top of the feed. They will produce up to 3,000 worms per square foot of container. This complete cycle will take only two to three months, if your culture is stored at, or slightly above, room temperature. Temperature plays a big role in the length of the beetle's life cycle. I start a new culture every month. This strategy keeps me in plenty of worms.
    6. Replace the apples whenever they are completely eaten or half spoiled. After the young mealworms are seen, keep two halves, rather than only one half apple, per square foot of container. Keeping plenty of moisture (apples) available keeps the worms growing faster. Potatoes also work, but apples work better because they supply more moisture for the worms.
    7. Put fully grown worms into another well-vented container with only some feed and a bit of apple. Store these in a cool place, or even in the refrigerator. This delays them from turning into pupae for up to six months. Set container out to room temperature for one day every week to allow the worms to feed.


    --------------------------------------------------------------------------------

    Raising and Feeding Mealworms
    Last edited by ejones1961; 03-02-2009 at 05:19 PM.

  4. #4
    Join Date
    Dec 2008
    Location
    ST. LOUIS MO
    Posts
    1,923
    Post Thanks / Like

    Default

    Very good but I don't use paper just mash and like you said about 2-3 months to get started then hold on for the inflax of meal worms way more than one person can use . I give away a lot to the neighbor kids and of course my grandkids...

  5. #5
    Join Date
    Mar 2006
    Location
    IN
    Posts
    956
    Post Thanks / Like

    Default

    I threw some mealworms in a 5 gallon bucket 15 years ago added some bran every once in a while give them something with some moisture like potatoe peels.

    I almost always have more mealworms than I can use. It doesn't take rocket science to grow some,maybe you can get more if you go by the book, but for my personal use this works fine.

    Meal worms also grow outside feed mills on the ground in wasted grain.

  6. #6
    Join Date
    Dec 2008
    Location
    ST. LOUIS MO
    Posts
    1,923
    Post Thanks / Like

    Default

    agree they are the easy blue gill bait to raise just keep out of the sun light. It' a no brainer and that's for me

  7. #7
    shipahoy41's Avatar
    shipahoy41 is offline Crappie.com Legend - 2022 Crappie.com Man of the Year
    Join Date
    Mar 2007
    Location
    Not Lakeside yet
    Posts
    14,432
    Post Thanks / Like

    Default

    Euro larvae – colored maggots – are probably the easiest bait to keep alive for many months. The most important factor to keeping the maggots alive is temperature.
    If you can keep you refrigerator at thirty-two to thirty-three degrees the maggots will stay dormant and keep for a long, long time. It is best to keep them in ventilated containers with dry sawdust. Every once in a while you may have to change the sawdust and remove the dead ones to keep the bait fresh and dry. When maggots get warm they get real active and if kept warm for a day or two will start the process of transforming into large black flies. Use a potato slice to provide moisture.

    As with any live bait, the key is to keep your bait fresh and lively. A good foam container is best. 
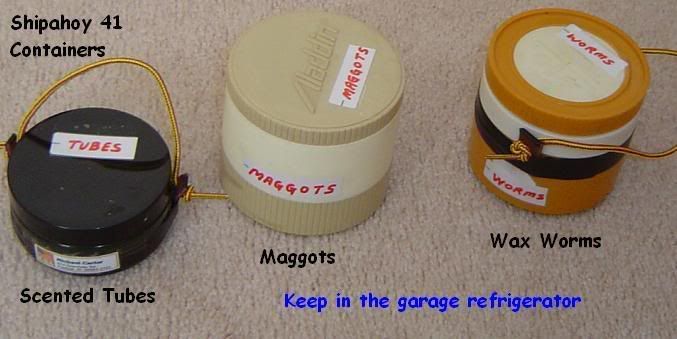
Maggots are the number one bait for big bull bluegills. One of the keys to the effectiveness of these baits is scent, but most people don't realize this. Maggots have a tiny scent sack at the blunt end, near their eyes. If you lightly hook them through that bulge, the sack will burst and release this scent. It really triggers Panfish, especially during the mid-day hours when they're usually not actively feeding. When fish don't want minnows, maggots can be the just the ticket. Tiny jigs tipped with maggots or waxworms is the most common rigging method.
    Aquatic Species Removal Engineer.
    May God be with you. Keep CALM and STAY ANCHORED with your faith.


  8. #8
    shipahoy41's Avatar
    shipahoy41 is offline Crappie.com Legend - 2022 Crappie.com Man of the Year
    Join Date
    Mar 2007
    Location
    Not Lakeside yet
    Posts
    14,432
    Post Thanks / Like

    Wink

    Earthworms are fragile. They have to stay cool all the time. If the temperature creeps up to about 60 degrees F and beyond, they'll die in a hurry.
    It is easiest to build a worm box using either an old sweater box with a lid, or simply buy a dark-colored plastic storage container with a cover (usually $8 on average). Surface area is more important than depth -- and too deep a box can lead to complications. Look for a container approximately 2' x 3' x 1' deep. Drill or punch about 10-20 small holes (1/4" or less) around the side of the bin for aeration, about 1" - 2" up from the bottom.
    Worm Caddy
    (7" x 14" x 8")


    Bedding is easily made by ripping up about five pounds of old newspaper (just the black and white sections) into one-inch wide strips. An easy method is to take several sheets of paper at one time, fold in half, and use scissors to start 1" long cuts about 1/2 to 1" apart. Then tear down the length using your initial cuts. Place the shredded newsprint in a bucket, and add about one to two gallons of water to soak thoroughly. Drain excess water and place in the worm box so that it's still fluffy. Worms need moist bedding to breathe through their "skin" and they also eat the cellulose fiber.


    Feeding worms is the fun part of vermicomposting. Feel free to include almost all fruits and vegetables, such as citrus and melon rinds, wilted lettuce, potato and carrot peelings, etc. You can also add coffee grounds and filters, tea leaves and bags, crushed egg shells, and houseplant prunings. Add food by lifting up the bedding, depositing the scraps, and always covering it with the damp bedding. This will prevent any odors or fruit flies.
    Last edited by shipahoy41; 03-03-2009 at 03:08 PM.
    Aquatic Species Removal Engineer.
    May God be with you. Keep CALM and STAY ANCHORED with your faith.


  9. #9
    Join Date
    Dec 2008
    Location
    Howey-In-The-Hills, FL
    Posts
    126
    Post Thanks / Like

    Default

    any one know about minnows...im interested as well!!

  10. #10
    Join Date
    Feb 2007
    Location
    Cleveland, Ga
    Posts
    34
    Post Thanks / Like

    Default

    Anybody know about the giant mealworms or superworms, I heard they were sterile and would not reproduce, is this true?

Page 1 of 2 12 LastLast

Posting Permissions

  • You may not post new threads
  • You may not post replies
  • You may not post attachments
  • You may not edit your posts
  •  

BACK TO TOP