Page 2 of 9 FirstFirst 12345 ... LastLast
Results 11 to 20 of 89

Thread: 2006 Mercedes C230 SPORT Restoration

  1. #11
    Join Date
    Apr 1996
    Location
    Central Florida
    Posts
    26,054
    Post Thanks / Like

    Default


    Wow, that's some detailed detail work. Which I am terrible at. I do about everything, except finish work. I paint things just to stop rust. Wifey wants to paint the inside of the house, I ask, why, is it rusting!
    Owner
    "Wear your PFD" "No texting n driving" slab
    Crappie.com members are the best

  2. #12
    Join Date
    May 2011
    Location
    Kiln, Mississippi
    Posts
    2,754
    Post Thanks / Like

    Default

    Quote Originally Posted by Slab View Post
    Wow, that's some detailed detail work. Which I am terrible at. I do about everything, except finish work. I paint things just to stop rust. Wifey wants to paint the inside of the house, I ask, why, is it rusting!
    I started working in Body Shops at 13 years old. I love to paint, I hung out with the Airbrush Artist back in the day Love Vans were all the rage. My Airbrush work is mostly all graphic art. Here I'm staying with the Factory Pearls but adding much better Clearcoat.

  3. #13
    Join Date
    Apr 1996
    Location
    Central Florida
    Posts
    26,054
    Post Thanks / Like

    Default

    Quote Originally Posted by rojoguio View Post
    I started working in Body Shops at 13 years old. I love to paint, I hung out with the Airbrush Artist back in the day Love Vans were all the rage. My Airbrush work is mostly all graphic art. Here I'm staying with the Factory Pearls but adding much better Clearcoat.
    I know where I went wrong, I was delivering newspapers on a bicycle when I was 13 years old. But I was also making minibikes out of lawnmowers too! lol
    Owner
    "Wear your PFD" "No texting n driving" slab
    Crappie.com members are the best

  4. #14
    Join Date
    May 2011
    Location
    Kiln, Mississippi
    Posts
    2,754
    Post Thanks / Like

    Default

    Quote Originally Posted by Slab View Post
    I know where I went wrong, I was delivering newspapers on a bicycle when I was 13 years old. But I was also making minibikes out of lawnmowers too! lol
    Yeah, there was no safe place back then for a side shaft Briggs & Stratton to Hide!
    Last edited by Rojo; 07-16-2023 at 10:05 AM.

  5. #15
    Join Date
    May 2011
    Location
    Kiln, Mississippi
    Posts
    2,754
    Post Thanks / Like

    Default Working the Frist Skimming and Filling Bumper Screw Holes

    I got the first skimming of epoxy sanded and shaped. The area I had to build up left numerous pinholes, that's air I mixed in making the wet repair compound. Also removed the pliers, today a heating iron for welding plastic is supposed to be delivered. The tears will get a little welding attention this afternoon.

    Name:  First Skimming Pinholes.jpg
Views: 160
Size:  38.5 KBName:  Front Plate Hole Opened.jpg
Views: 158
Size:  41.2 KBName:  Front Plate Hole Opened 2.jpg
Views: 154
Size:  49.2 KBName:  Bumper Repair on Mixing Pad.jpg
Views: 154
Size:  37.1 KBName:  MiniMax Bumper Repair.jpg
Views: 159
Size:  71.5 KBName:  Grinding Stone for Holes.jpg
Views: 148
Size:  47.7 KBName:  Front Plate Holder Holes Filled.jpg
Views: 160
Size:  63.0 KB

    When working on plastic body parts I have found using very sharp sandpaper with less pressure does a better job cutting plastic. A slower speed helps too. I first went after the old License Plate mount holes with a grinding stone in my Dremel tool opening them up a bit. Then mixing the Bumper Repair Epoxy on a mixing pad a bondo spreader was used to apply the repair epoxy to the holes.

    Name:  Best DA Paper.jpg
Views: 148
Size:  70.2 KBName:  Uneven Sanding Marks.jpg
Views: 151
Size:  60.2 KBName:  45 Year Old Rubber Block.jpg
Views: 147
Size:  57.9 KB

    Going after the first sanding of epoxy with my favorite sandpaper I noticed when sanding the Drivers Side with the 180 grit a real uneven scratch pattern was revealed. You read the scratch patterns to know it you're cutting level, have high spots, low spots or waves developing. This odd scratch pattern told me to stop with the DA, the bi-directional radius of the panel was all bad for DA sanding. I pulled out my trusty rubber block (I've had it 45 years) and blocked the wave out before it got good and started.

    Name:  2nd Skimming.jpg
Views: 149
Size:  80.5 KBName:  2nd Skimming 2.jpg
Views: 152
Size:  82.0 KB

    With everything blocked I could move on the another skimming. Here the compound is just resin-fast hardener-410 Microlight. Since we have epoxy down I don't need to add the 406 Thickener. All we are filling here are 80 grit scratches, pinholes, and 2 Holidays. You work yourself out of a job quickly, this is part of the reason panel repair takes time. Curing Time.
    Likes S10CHEVY LIKED above post

  6. #16
    Join Date
    May 2011
    Location
    Kiln, Mississippi
    Posts
    2,754
    Post Thanks / Like

    Default Continuing the Bumper Repair & Building up Missing Areas

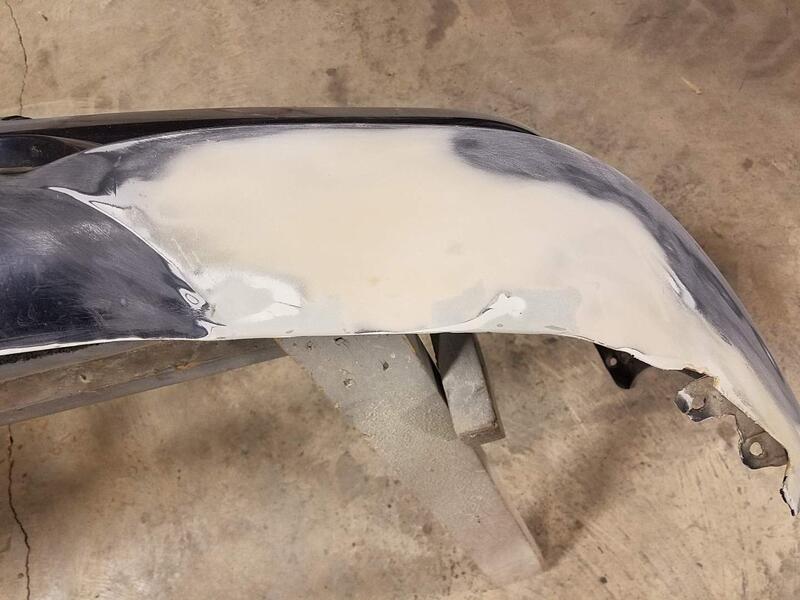
    Sanded the second skimming down, it took care of all the pinholes. The plastic repair welding kit arrived. 3 spots needed to be built back up past the original edge of the bumper so enough can be sanded down kinda straightening everything out. You can't see it unless you jack up the car, it sits that low in the front from the factory.

    Name:  Torn Bumper 1.jpg
Views: 140
Size:  56.4 KBName:  Torn Bumper 2.jpg
Views: 142
Size:  40.3 KBName:  Torn Bumper 3.jpg
Views: 139
Size:  61.4 KBName:  Torn Bumper 4.jpg
Views: 139
Size:  56.8 KB

    The areas needing plastic welding are buffed with a 2in surfacing pad and die grinder back to clean plastic. Reinforcement SS Screen is cut to fit the repair areas. The Welding Iron is then used to melt new plastic into those areas till a excess build up occurs. Then holding the reinforcement in place the Iron is used to melt the reinforcement in encapsulating the reinforcement.

    Name:  Torn Bumper 5.jpg
Views: 138
Size:  64.3 KBName:  Torn Bumper 6.jpg
Views: 142
Size:  59.0 KBName:  Torn Bumper 7.jpg
Views: 138
Size:  77.3 KBName:  Torn Bumper 8.jpg
Views: 144
Size:  66.7 KB

    Now from the outside the SEM Bumper Repair Epoxy can be used to finish filling and building out the rest of the bumper cover damage.

    Name:  Torn Bumper 9.jpg
Views: 141
Size:  65.0 KBName:  Torn Bumper 10.jpg
Views: 138
Size:  55.1 KB

    A final sanding to level and even out the edges. It's not a "Like New" repair but I'm saving over $700 fixing somewhere you can't see without a mirror.
    Name:  Torn Bumper 11.jpg
Views: 141
Size:  51.2 KBName:  Torn Bumper 12.jpg
Views: 150
Size:  56.2 KB
    Likes SuperDave336, S10CHEVY, Jamesdean LIKED above post

  7. #17
    Join Date
    May 2011
    Location
    Kiln, Mississippi
    Posts
    2,754
    Post Thanks / Like

    Default New Headlights, Radiator Fan, and Hood Ornament

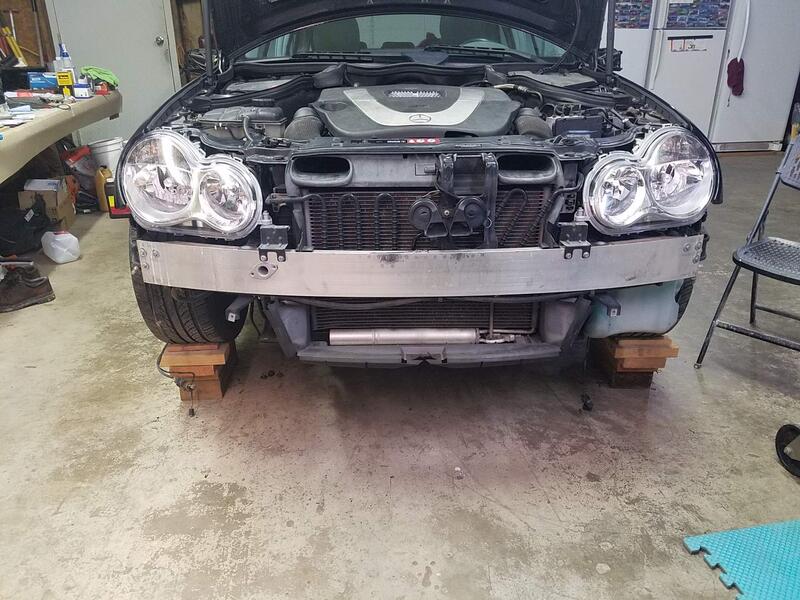
    Managed to sand the Bumper cover and found it needed a few spots glazed so while that is curing I installed a new Radiator Fan (Not Shown), new Hood Ornament and new Headlights. Still waiting on the new Fog Light fixtures. I opened the Hood one day and the Ornament just fell off.
    Name:  Broken Hood Ornament.jpg
Views: 138
Size:  35.5 KBName:  New Hood Ornament.jpg
Views: 136
Size:  52.1 KBName:  New Headlights Installed.jpg
Views: 145
Size:  91.8 KB
    Likes BuckeyeCrappie, S10CHEVY LIKED above post

  8. #18
    BuckeyeCrappie's Avatar
    BuckeyeCrappie is offline Super Moderator * Crappie.com Supporter * Member Sponsor
    Join Date
    Jun 2019
    Location
    Rutland, OH
    Posts
    34,145
    Post Thanks / Like

    Default

    Ya got bling!
    “If your too busy to fish, you’re too busy!” Buddy Ebsen
    PROUD MEMBER OF TEAM GEEZER
    (Billbob and “G” approved!)
    Proud member of Tekeum’s Jigs Pro
    Staff

    https://heavenornot.net/

    heavenornot.net
    Likes Rojo LIKED above post

  9. #19
    skeetbum's Avatar
    skeetbum is offline Crappie.com Legend - Moderator Jig Tying Forum * Crappie.com Supporter
    Join Date
    Dec 2007
    Location
    Florida
    Posts
    23,144
    Post Thanks / Like

    Default

    I fooled around in body shops in my late teens and into my early twenties. The only work they wanted me to do was tape and remove tape that had gotten wet with dew and didn’t want to come off. Grunt work. Some of what they were working on rubbed off on me and came back around when I built boats for correct craft, the ski nautique people and now bass cat also. I learned that I knew more than I was told I did. Overbuilding and grinding and sanding is tedious but not as hard as some folks think with the right materials and techniques. Materials have changed greatly since my day. That’s a neat project and some nice work you’re doing. Satisfies that inside urge to keep the hands and the brain busy.
    Creativity is just intelligence fooling around
    Likes Rojo, Cane Pole LIKED above post

  10. #20
    Join Date
    May 2011
    Location
    Kiln, Mississippi
    Posts
    2,754
    Post Thanks / Like

    Default Priming Bumper Cover and New Fog Lites

    Since the rest of the small stuff primer would fill I brought the Bumper Cover out to my "Backyard Body Shop Spray Booth" LOL. I had a spray booth inside here till I added the Metal Building addition. Now its wait for a hot humid day and spray before the bugs wake up. Isocyanate cured 2K Urethanes love the heat and moisture. I keep all open catalyst can in the fridge.

    Name:  Bumper Cover Primer Ready.jpg
Views: 110
Size:  70.7 KB

    After a good wipedown with Acrylaclean and tacking I mixed up some PPG Refinish Shopline JP375 Epoxy Primer. Usually this is just used as a adhesion coat or millage for corrosion but here I'm using to fill too. After mixing you let the paint sit for 15 minutes Induction Time then it's spray time. After the first coat I let it sit for 15 minutes and you could see it soaking or burning into the Epoxy repair work. second coat to 4th coat each time increasing drying time 15 minutes. With the heat we had that was plenty.

    Name:  Cover After 4 Coats Epoxy Primer1.jpg
Views: 110
Size:  54.4 KBName:  Cover After 4 Coats Epoxy Primer2.jpg
Views: 110
Size:  51.2 KBName:  Cover After 4 Coats Epoxy Primer3.jpg
Views: 108
Size:  59.1 KB

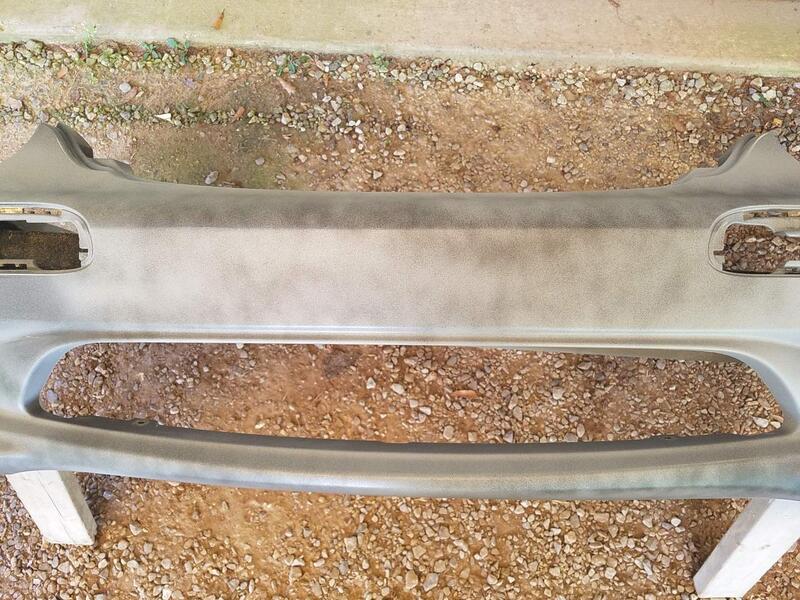
    I allowed it to sit outside covered for 3 days for the Epoxy to really harden then sprayed "Guide Coat" sanding guide coat to all work. This makes it very easy to see any imperfections while sanding. Since this is Basecoat/Clearcoat I will sand with a 500 grit.
    Name:  Guide Coat for Sanding.jpg
Views: 109
Size:  85.4 KBName:  Guide Coat Applied to Bumper.jpg
Views: 111
Size:  108.3 KB
    Likes S10CHEVY LIKED above post

Page 2 of 9 FirstFirst 12345 ... LastLast

Tags for this Thread

Posting Permissions

  • You may not post new threads
  • You may not post replies
  • You may not post attachments
  • You may not edit your posts
  •  

BACK TO TOP