 Likes:
  Thanks:
 Reply With Quote
Great, FYI- all I used for many years for Crappie fishing was a 9' fly rod Thanks for posting this thread!

 HaHa: 0
 Crappie.com 1K Star General

I am making a rod for my fishing pardner who likes to remain anonymous on this website as he is a notorious lurker. I refer to him as the Lone Stranger.I thought I would show every step of the procedure so that those that are considering making a few rods would see just how easy it is.
This is how I build a rod and by no means the only way to build a rod. For me, this process gives the most sensitivity to the rod which is desirable for the avid crappie fisherman.
The first step is to determine exactly what the customer wants as no one wants to pay a fortune for a rod and then not be happy with it. I use the term customer rather loosely as I am retired and this is charity work for the fishing challenged
We have the rod blank
reel seat
graphite arbors for the reel seat
cork for grip
and guides with tip.
Additional post will show each step.
Crappie.com Legend
Great, FYI- all I used for many years for Crappie fishing was a 9' fly rod Thanks for posting this thread!
Crappie.com 1K Star General
Fly rod blanks make great crappie rods. They can be built with the traditional fly rod reel seat and fore grip only or with a spinning reel seat with both a rear grip and a fore grip. The Lone Stranger does not like a rear grip.
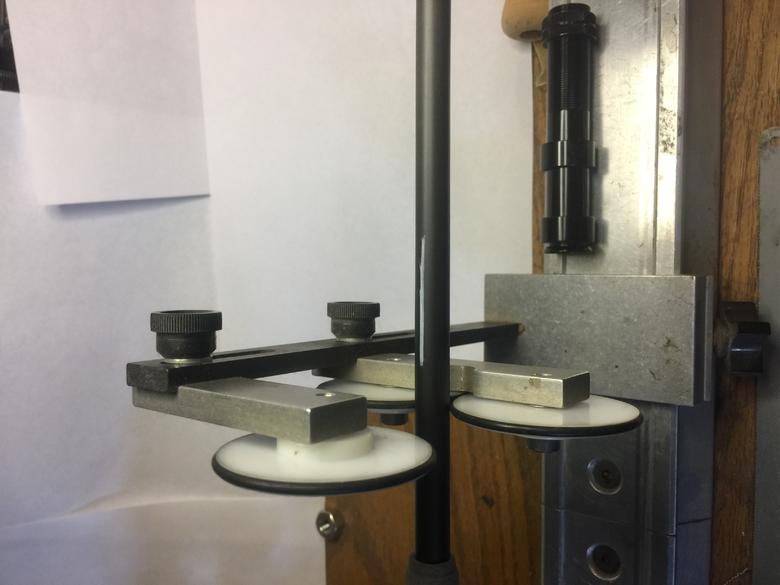
The first step is to spline the rod blank. If a rod bland is placed in the palm of a hand near the tip end applying slight downward pressure on the blank and the butt end is rolled on a smooth surface the spline very quickly becomes evident. The spline can be described in a lot of detail but for our purposes I will say that the spline is where the rod wants to bend. The rod can be built paying no attention to the spline but best results are achieved when the guides are placed on the axis of the spline. There will be 2 splines on every rod blank but one will be prominent. Special gadgets are made to identify the spline but they can be splined easily by simply rolling the but end on a smooth surface. Once the spline is found it should be marked.
Crappie.com 1K Star General
The next step on this rod is to put the rear most graphite arbor on the blank. The graphite arbors are used to fill the void between the rod blank and the reel seat. The rear arbor is glued to the rod blank first and then the reel seat is glued to the arbor with the reel seat positioned properly in respect to the spline. I use an expanding glue to completely fill the space between the reel seat and the graphite arbor. Place the tip most arbor in as the expanding glue begins to fill the void so that the glue expands around the arbor and out the tip end of the reel seat. Care must be taken to keep the glue wiped off the the reel seat and the exposed portion of the rod blank. If the glue sets on an exposed section of the reel seat or rod blank it will not come off. It usually takes me three applications of the expanding glue to get it to expand all the way out of the reel seat. This takes me about three hours per application. Many people use masking tape to fill the void between the rod blank and the reel seat but the masking tape will work as a shock absorber and diminish the rod's sensitivity. Vibrations will propagate through the solid glue better than it will through the air in a reel seat with masking tape. The extra effort is worth the results.
I use 70% isopropyl rubbing alcohol to clean the glue. I use Gorilla glue to glue the reel seat.
It is good to double check everything as you go. As I began to glue the reel seat on I noticed that the space on the reel seat that holds the reel seamed a bit shallow. I grabbed a spinning reel and tried to put it on the reel seat and sure enough it would not fit. This is a real disappointment as I paid extra money to get the rod owners name engraved on the reel seat. I also now have to order another reel seat. bummer.
Crappie.com 1K Star General
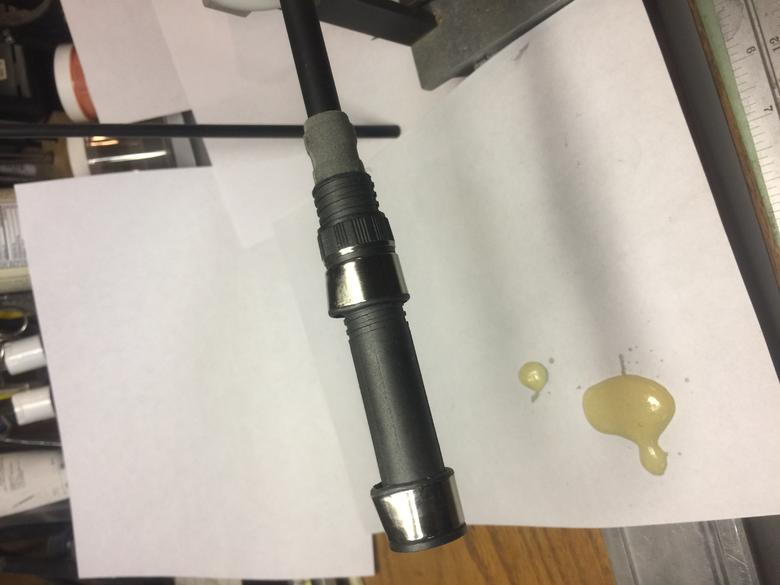
Just starting to glue the reel seat on. This is the first application of expanding glue. It takes about 3 hours to dry so I am baby sitting glue. It is almost as much fun as watching paint dry except it is enteractive in nature.
This is is why I have to baby sit.
The excess glue glue must be kept cleaned off.
Crappie.com 1K Star General
Admittedly there are many faster ways of doing this but in my opinion using expanding glue makes the rod much more sensitive. Usually there is a rear grip but the Lone Stranger didn’t want one and since the reel seat I ordered came back defective I am using a standard spinning seat at the Lone Strangers request and will paint the exposed glue black. Sometimes a rod builder has to get innovative but it will still look good when I get done with it.
Crappie.com 1K Star General
I have slid the front graphite arbor just inside the reel seat so that the reel seat sets straight with the initial application of expanding glue. I have checked the front graphite arbor a few times to be sure there is no glue on it as the next 2 applications of glue will be poured into the tip end of the reel seat. On the last application of glue I will press the front graphite arbor into the reel seat so the glue expands around it and out the end of it so as to provide a solid gluing. I have also aligned the reel seat properly with the spline.
Crappie.com 1K Star General
Crappie.com 1K Star General
Crappie.com 1K Star General


