 Likes:
 Reply With Quote
Way, way, cool on McGivering the Microwave into a curing cabinet Bud!

 HaHa: 0
 Super Moderator
* Crappie.com Supporter * Member Sponsor
Super Moderator
* Crappie.com Supporter * Member Sponsor

Needed items
- Microwave
- Screwdrivers
- Drill with bits
- Aluminum Tape
- UV Curing light
- Dremel with cutting wheel or metal shears
So I had seen a video on YT about this so I tried it. I took a microwave that was fully functional but had been in a closet for years. All one really needs is an old microwave that doesnt have a functioning magnetron but still has power and a functioning keypad.
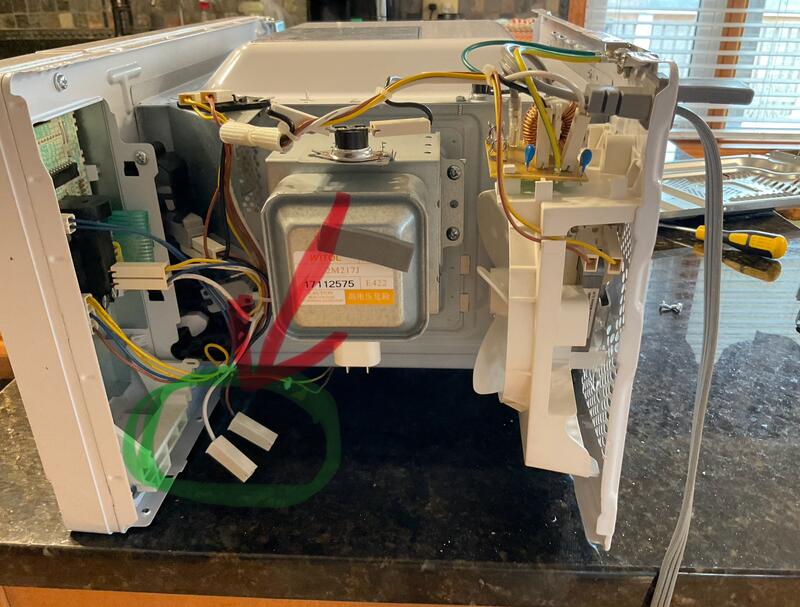
I removed the cover (s) to expose the inner guts of the microwave. The Capacitor, Magnetron and High Voltage Transformer were identified and removed. At this point I started plotting where and how I was going to cut the hole and mount the UV curing light. There was an existing area (wave guide) where I could cut the hole to put the curing light in. I used metal snips to accomplish this and the light fit perfectly. ( I would have used a Dremel but I didnt have a cutting wheel handy and I wasnt running 30 miles to town.
OPENING THE MICROWAVE TO EXPOSE THE GUTS
CAPACITOR AND HIGH VOLTAGE TRANSFORMER REMOVED. NOTE: THE MAGNETRON REMAINS AND IS THE SQUARE SHAPED PART WITH THE YELLOW STICKER.
After removing the wave guide (popped the micro welds with a big screwdriver) and cutting the hole i test fit the light, smoothed the cut edges with a file and taped around them with Aluminum tape.


At this point I could have cut the power cord to the UV curing light and wired it into the existing internal power wires that powered the transformer which would have allowed the UV light to come on when I started the microwave. It would have been convenient however I chose to leave the original cord powering the light intact to facilitate easy removal should it go bad or the microwave unit have issues. I installed the light securing it with aluminum tape and the bracket that came with the light.

TRANSFORMER POWER WIRES IDENTIFIED
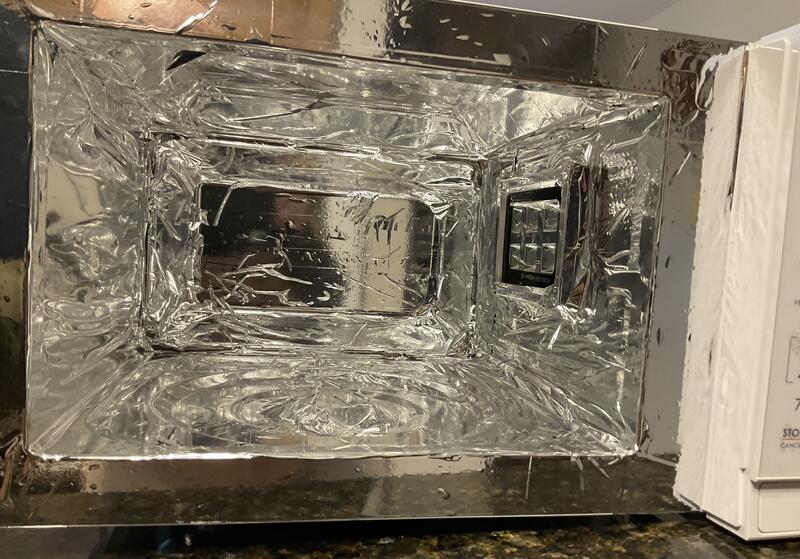
After installing the light I taped the inside of the microwave in it entirely so that the light reflects all over the inside to facilitate complete curing.


I set the microwave using the units timer and it runs as normal with the turntable rotating. I power the light on individually with its own on off switch.
Tested it out before buttoning up the unit and everything is a go.
Special thanks to my wife for putting up with me doing this on the kitchen counter inside on a cold rainy day.
LINK TO THE UV LIGHT UNIT I BOUGHT FROM AMAZON:
Amazon.com

If your too busy to fish, youre too busy! Buddy Ebsen
PROUD MEMBER OF TEAM GEEZER
(Billbob and G approved!)
Proud member of Tekeums Jigs Pro
Staff
https://heavenornot.net/
heavenornot.net
Crappie.com 2K Star General
Way, way, cool on McGivering the Microwave into a curing cabinet Bud!
BuckeyeCrappie thanked you for this post
 Super Moderator
* Crappie.com Supporter
Crappie.com Legend
Super Moderator
* Crappie.com Supporter
Crappie.com Legend
Awesome ingenuity on the UV cabinet for sure. Thank you for sharing...Gonna file this away for when I get my shop set up.
Proud to have served with and supported the Units I was in: 1st IDF, 9th INF, 558th USAAG (Greece), 7th Transportation Brigade, 6th MEDSOM (Korea), III Corp, 8th IDF, 3rd Armor Div.
1980 Ebbtide Dyna-Trak 160 Evinrude 65 Triumph
Crappie.com 3K Star General
Posting Permissions


