 HaHa:
HaHa: 
 Reply With Quote
Great work on the boat as well as explaining it in detail, and pictures. I for one will be referencing this blog many times when the time comes that I get to start on my boat. Thank you a bunch. That wine looks delicious already.

 Crappie.com 2K Star General

Bud, thank you, I have always had the personality of Perfectionist and it is a curse as well as a blessing. This project takes a ton of time across so many different repairs or corrections. Most issues a Restoration boat may face will seem to be covered somewhere in this thread. Photographing & Documenting to preserve the actions taken for the future DIY person is my goal. When I was researching Blueprinting for example little information on How to Get There was posted anywhere. Growing up in Body shops you at least know when a panel is "Flat" so applying that here then documenting how to get there will be one of the only posts about Blueprinting on the entire web.Originally Posted by SuperDave336

SuperDave336 LIKED above post
Jamesdean thanked you for this post
 Crappie.com Legend
Great work on the boat as well as explaining it in detail, and pictures. I for one will be referencing this blog many times when the time comes that I get to start on my boat. Thank you a bunch. That wine looks delicious already.
Proud to have served with and supported the Units I was in: 1st IDF, 9th INF, 558th USAAG (Greece), 7th Transportation Brigade, 6th MEDSOM (Korea), III Corp, 8th IDF, 3rd Armor Div.
1980 Ebbtide Dyna-Trak 160 Evinrude 65 Triumph
Crappie.com 2K Star General
So I had a different plan for today but rain changed that. The console needed the switch panel cut in along with the other console hatch (can't fully open port hatch). Both hatches needed a thru bolting installation. So after taping multiple layers of painter's tape on the switch pattern and nearby gauges I cut out the opening. The top of the switch panel had lots of room but the bottom where the fuses holders are located I had to cut further into the console for clearances needed to install the switch panel. Notice in the pictures I made sure all back cuts needed to square up the opening was completed before finishing the opposite direction cuts. It's much easier to keep your saw blade perpendicular with the extra support. I like this switch panel because it is dual feed, not a overloaded single supply circuit.
The pattern that comes with this particular hatch is too oversized for me. If you cut out to their pattern sometimes the hole is way too big. I make my own patterns, you can see from my pattern cut out how much smaller it is. Since I like a shoehorn fit I use "Brutus" to fine trim to perfection. The hatches are thru bolted, silicone sealed to console, and squared up with the deck since all the angles on the console are on some kind of taper. A double layer of 2in tape is used to ensure no scratches from the saw occur.
So the plan is to do all console work thru the Tackle Box opening so I have to keep it removable. You can see in the picture my shoehorn fit again as I will have to remove the box to hook up steering hoses. Even the Tach only has 1/2in of clearance.
Got the console sitting back on deck getting ready to install the installation guide pins. The only way to nail a perfect position. Y'all know I built T-Tops. New boats would come in with very crooked center consoles. It was very hard to bend the pipe to take into account a poorly positioned console and still keep my Top looking straight to the human eye. Name brand boats too.
Super Moderator
* Crappie.com Supporter * Member Sponsor
Wow! That’s some beautiful work. What kind of bit is that in your air tool?
If your too busy to fish, youre too busy! Buddy Ebsen
PROUD MEMBER OF TEAM GEEZER
(Billbob and G approved!)
Proud member of Tekeums Jigs Pro
Staff
https://heavenornot.net/
heavenornot.net
Crappie.com 2K Star General
That is a Single Cut Carbide Bit. It throws Rooster Tails of Aluminum shavings but you must hold on to it well. I think that one is 7/8in diameter.
Super Moderator
* Crappie.com Supporter * Member Sponsor
Thanks buddy.
If your too busy to fish, youre too busy! Buddy Ebsen
PROUD MEMBER OF TEAM GEEZER
(Billbob and G approved!)
Proud member of Tekeums Jigs Pro
Staff
https://heavenornot.net/
heavenornot.net
Crappie.com 2K Star General
I managed to complete the high gloss gelcoat application on the cockpit deck. I will break down the process in this post.
All the hatches are off since I have to topcoat finish them for SeaDek instead of carpet. The openings has to be mask closed till I'm finished so I cut cardboard to fit the flanges of each hatch and mask with green lacquer masking tape. You don't want to let the sun shine on this tape or you risk it really hard to remove. Also the break lines were laid out so I can keep a mental picture of the finished product I'm working towards.
Here is a couple of pictures of the deck after machine sanding with 320 grit to level. A wipe down solvent was used after sanding. SeaDek will be installed so most of this will be covered up but this step still had to be completed. Spraying the inside verticals can only be done from the inside so I have to be able to stand, get in and out, to maintain the proper fan distances and angles so I don't spray a bunch of orange peel into the gelcoat.
By bringing the break line up a inch or so off the deck the next step break line I can scuff just the ledge left by this gelcoat application and mask a slight overlap to hide it. Heavy craft paper is used here to ensure no gelcoat overspray creates more work for me in the next stages of gelcoating.
So a 50% mixture of Black Gelcoat to Duratec's High Gloss additive was used along with the ALL IMPORTANT Duratec Reducer. I have been spraying using MEK or MEK Substitute as a reducer but the gloss sinks using that reducer. The black I'm spraying over had MEK as a reducer. When you was to spray gelcoat with a minimum of follow up surface correction Duratec's reducer must be used.
Here is a unmasked picture showing the gloss holdout. If your buying the Duratec High Gloss Additive buy their reducer too. Look how rich the Black is using the proper reducer.
Crappie.com 2K Star General
A bit of a breather around here and the gelcoat on the deck is hard enough I can't mark it with my thumbnail. Time to install the SeaDek in the Cockpit. Now this is one color SeaDek. SeaDek put a bunch of their rolled, packaged for retailers product on sale Christmas before last and I bought 10 sheets up for my projects. It is working out that I will have a totally SeaDek boat for less than $100 (including shipping). Earlier in the post I posted pictures of the patterns I made out of sheet acetate. I took the patterns I made to cut the SeaDek for everything. Now if I need to replace any of it duplicating the original will be a walk in the park. By having all patterns made I was able to layout everything in 2 sheets leaving me 2 sheets matching for backup.
Well I really didn't feel like making a jig for my router table and routing the bevels so with a steady hand holding the surfacing disc at a 45 degree angle I took my time and put a bevel on all of the Seadek. Being cut from whole sheets at home the back needs to be scored thru the protective backing paper, a flap folded, then unfolded for easy of handling.
The easiest way to return to the position or location you plan to install the SeaDek is to use a hinge made of masking tape. Here I use the hinge to begin the install making sure the unhinged right hand edge does not touch anything while lowering in alignment the beginning of the application. After I'm sure of the correct position I stick the rest of the first half down. You can see I'm holding the other half up till I pull the balance of the protective paper off. Do Not pull on the paper stretching the SeaDek, take you time rocking the backing off then just lower it working towards yourself till it's all stuck down.
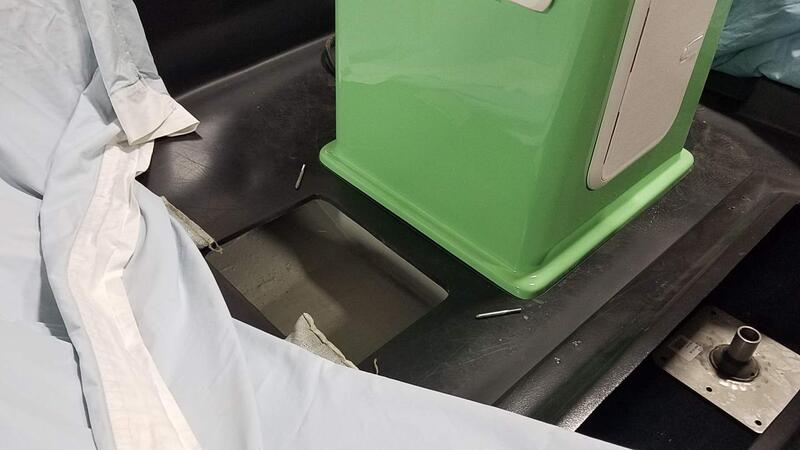
Going around an object like a console is a little tricky. You can see in the picture I left the protective backing on the opposite half, this piece had a curved masking tape hinge so extra care was taken but I still was out of alignment 1/8 inch. Once I crossed the other side of the console I very slightly pulled and slightly stretched the SeaDek to ensure the tab alignment was on the money with the Port Aft piece.
Lastly a picture of finished Cockpit Deck.
Super Moderator
* Crappie.com Supporter * Member Sponsor
Very nice and in my favorite color to boot!
If your too busy to fish, youre too busy! Buddy Ebsen
PROUD MEMBER OF TEAM GEEZER
(Billbob and G approved!)
Proud member of Tekeums Jigs Pro
Staff
https://heavenornot.net/
heavenornot.net
Crappie.com 2K Star General
yeah, it's really a Love it or Hate it color pattern. I have always liked a color blocked boat. Black & Green especially. I'm thinking of shooting the Seafoam Lime Green with a 2K Urethane just to make it brighter but that will have to be later. It had to have a black hull. I discovered about 25 years ago fishing in the marsh Black is the best hull color when Redfish were just swimming into the side of a Black Aluminum boat we built. Black hull with the black marsh mud really does not spook the fish like a white hull does.


